Table of Contents
- Start With a Kitchen Remodel Budget Template
- Build a Kitchen Remodel Cost Breakdown
- How to Stretch a Kitchen Renovation Budget
- Use a Kitchen Remodel Planning Checklist
- Compare Contractor Bids and Payment Schedules
- Plan for Contingency and Hidden Costs
- Frequently Asked Questions
Last Updated: October 13, 2026
Start With a Kitchen Remodel Budget Template
The fastest way to plan a kitchen remodel budget is to build one document listing every cost category before you talk to a contractor. It assigns a dollar figure to each part of the project and tracks actual spending against it. Homeowners who skip this step often discover mid-project that the money ran out.
What to Include in Your Template
Your template needs five columns and one running total:
- Category (cabinets, countertops, appliances, labor, permits)
- Estimated cost
- Actual cost
- Difference
- Notes (who quoted it, when the quote expires)
Add a separate line at the bottom for your contingency fund. Keep it visible, not buried.
How to Fill It Out
Fill it out in this order:
- Write your total budget ceiling at the top, your hard stop.
- List every category, even small ones.
- Enter placeholder estimates from your own research.
- Replace placeholders with real quotes as they arrive.
- Update the difference column weekly.
When the difference column goes negative, adjust before the money is gone.
Contractors quote from memory far less accurately than they quote from a written scope. Hand every bidder the same itemized list, and their numbers become comparable instead of apples-to-oranges.
Build a Kitchen Remodel Cost Breakdown
A kitchen remodel cost breakdown splits your total into categories so you can see where the money goes. Most projects concentrate spending in cabinetry, countertops, appliances, and labor.

A Sample Itemized Budget You Can Copy
The table below is an example for a mid-range full remodel with a $60,000 total. It is not a quote, it is a percentage framework you can scale to your own ceiling, then replace with real bids.
| Category | Share of Total | Example at $60,000 | Notes |
|---|---|---|---|
| Cabinets | 25-30% | $15,000-$18,000 | Largest single line; stock vs. semi-custom vs. custom drives the swing |
| Countertops | 8-12% | $4,800-$7,200 | Laminate at the low end, quartz and granite at the high end |
| Appliances | 10-15% | $6,000-$9,000 | Refrigerator, range, hood, dishwasher, microwave |
| Labor (all trades) | 20-25% | $12,000-$15,000 | Plumbing, electrical, tile, install, demolition, separate rates |
| Flooring | 5-8% | $3,000-$4,800 | Material plus install; square footage is the multiplier |
| Lighting and electrical | 4-6% | $2,400-$3,600 | Recessed cans, under-cabinet, outlets, dedicated circuits |
| Plumbing fixtures | 3-5% | $1,800-$3,000 | Sink, faucet, disposal; relocation adds labor |
| Backsplash | 3-5% | $1,800-$3,000 | Tile choice and pattern complexity move the number |
| Paint and drywall | 2-4% | $1,200-$2,400 | Patching, priming, two finish coats |
| Permits and fees | 1-3% | $600-$1,800 | Varies by jurisdiction and scope |
| Design and drawings | 2-4% | $1,200-$2,400 | Often waived if you use the contractor’s designer |
| Contingency | 10-20% | $6,000-$12,000 | See the contingency section below |
Two things to notice. First, cabinets plus labor plus countertops usually consume more than half the budget, that is where trade-offs matter most. Second, the contingency line is not optional padding; it keeps the project from stalling.
Cabinets and Countertops
Cabinets and countertops usually take the largest share of any kitchen budget. Cabinet choices drive the number more than almost anything else:
- Stock cabinets cost the least and arrive fast
- Semi-custom cabinets balance price and fit
- Custom cabinets cost the most but match odd spaces
Countertop material matters too: laminate sits at the budget end, quartz and granite at the top. A common mistake is choosing the finish before checking lead time, a slab on a twelve-week backorder can stall your project.
Appliances, Flooring, and Labor
Appliances are the easiest category to control because you can shop sales and buy early. Flooring costs depend on material and square footage. Labor often surprises homeowners because it hides inside every trade: plumbing, electrical, installation, and demolition.
The most common budget mistake is treating labor as a single line item. Plumbing, electrical, and installation are separate trades with separate rates. Bundle them into one number and you will underestimate by a wide margin.
How to Adjust the Example to Your Own Project
Start with your total ceiling, not the example total. If your ceiling is $30,000, cut every line roughly in half and expect harder trade-offs, a $30,000 full remodel is tight in most markets, so you may need to keep the existing layout and refinish rather than replace cabinets.
A practical rule: as your total rises, the percentage spent on finishes grows and labor shrinks slightly. As your total falls, labor and permits become a larger share, because those costs do not scale down with your taste.
How to Stretch a Kitchen Renovation Budget
Stretching a kitchen renovation budget comes down to protecting the parts that add home value and trimming the parts that don’t. Our team helps homeowners sort must-haves from nice-to-haves before demolition starts.
Here’s where the savings usually live:
- Keep the layout. Moving plumbing and gas lines is expensive. Leaving fixtures in place saves real money.
- Refinish instead of replace. Painting or refacing cabinets costs far less than new ones.
- Choose mid-range finishes. They look close to high-end and cost much less.
- Buy appliances during sales. Timing the purchase can save hundreds.
- Do the demolition yourself. If you’re able and permitted, this cuts labor.
A cosmetic update can refresh a kitchen for a fraction of a full remodel. A full remodel costs more but changes the room completely. Pick based on how long you plan to stay.
The single biggest lever on your budget is layout. Keep the sink, stove, and fridge where they are, and you avoid the most expensive trades in the project.
Use a Kitchen Remodel Planning Checklist
A kitchen remodel planning checklist keeps the project moving in the right order. Skip a step and you pay for it later, usually in delays or rework.
Work through it in this sequence:
- Set your total budget ceiling
- List must-haves and nice-to-haves
- Measure the kitchen and note the layout
- Gather three contractor estimates
- Confirm permits and inspection requirements with your local building department
- Order long-lead items first (cabinets, countertops, appliances)
The permit step is the one people rush. The U.S. Department of Housing and Urban Development publishes homeowner resources on renovation and financing that are worth reviewing before you commit.
Our exclusive Last Day Breakthrough system exists because of this checklist problem.
Compare Contractor Bids and Payment Schedules
Comparing contractor bids means normalizing every quote to the same scope before you look at the price. The lowest number is not always the cheapest project.
Follow this method:
- Write one detailed scope of work and give it to every bidder.
- Require each bid to list labor and materials separately.
- Ask each contractor to state what is excluded.
- Check licenses, insurance, and references.
- Compare line by line, not total to total.
Use a table to see the differences at a glance:
| Bid Item | Contractor A | Contractor B | Contractor C |
|---|---|---|---|
| Scope matches | Yes | Partial | Yes |
| Labor listed | Itemized | Lump sum | Itemized |
| Permits included | Yes | No | Yes |
| Timeline stated | 8 weeks | Unclear | 10 weeks |
| Payment schedule | Milestone | Upfront | Milestone |
On payment, never pay the full amount upfront. A safe schedule ties payments to completed milestones: a deposit at signing, then payments as each phase finishes, with a final payment after inspection.
The Federal Trade Commission’s consumer guidance on home improvement covers your rights on contracts and cancellation, and it’s worth reading before you sign anything.
Plan for Contingency and Hidden Costs
Contingency planning is the difference between a project that finishes and one that stalls. Hidden costs appear in almost every remodel, and homeowners who plan for them stay calm when they show up.
How to Size Your Contingency Fund
Most practitioners size the reserve as a percentage of the total budget, matched to the project’s risk:
- Cosmetic refresh, no walls opened, home built after 2000: 10% reserve
- Mid-range remodel, some plumbing or electrical moved, home built 1980-2000: 15% reserve
- Full gut remodel, walls opened, home built before 1980: 20% reserve
On a $60,000 project, that is $6,000, $9,000, or $12,000 held back. Treat the reserve as untouchable until a surprise appears. Spend it on an upgrade and you no longer have a reserve, just a bigger project with the same risk.
Three Hidden-Cost Scenarios and What They Cost
These are the surprises that show up most often once demolition starts.
Scenario 1: Outdated wiring behind the walls. A home built before the 1980s may have aluminum branch wiring or no grounded circuits in the kitchen.
Scenario 2: Plumbing that does not match the plan. Keep the sink where it is and plumbing risk is low.
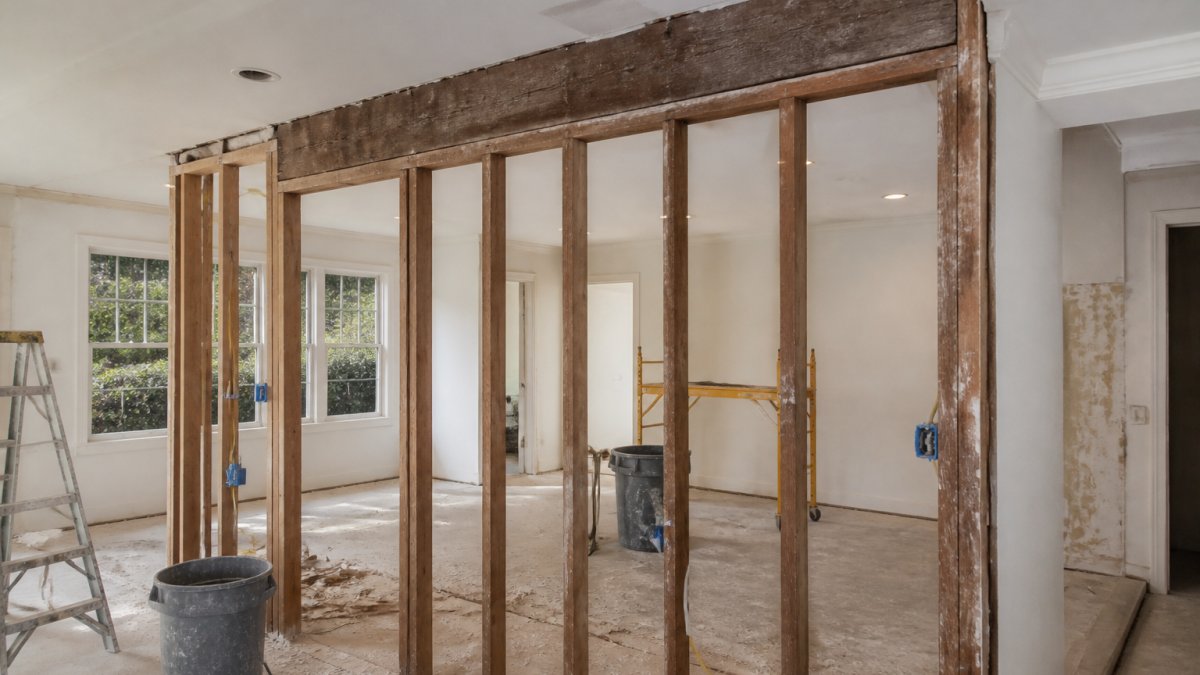
Scenario 3: Structural or water damage. A load-bearing wall you want to remove needs a header and possibly an engineer’s letter.
Ask your contractor how they handle change orders in writing. The best answer names a process: written approval, a price, and a timeline impact before any extra work begins.
Financing, Payment Schedules, and Cash Flow
A project valued between $20,000 and $300,000 deserves a payment plan written down and agreed on both sides. The goal is to match when money leaves your account to when work is actually completed, not to when the contractor asks.
Common approaches homeowners use:
- Cash savings: lowest cost, but ties up liquidity and leaves no cushion if the reserve is spent.
- Home equity loan or HELOC: fixed or variable rate against your equity; a HELOC gives a draw period that can match milestone payments well.
- Cash-out refinance: replaces your existing mortgage; worth comparing only if the rate math works for you.
- Contractor financing or retail card promotions: convenient but often carries deferred-interest traps if the balance is not paid in full during the promo window.
Whichever you choose, map the draw schedule to the milestone schedule:
- Deposit at signing, small, enough to order long-lead materials
- Payment when demolition and rough-in are complete
- Payment when cabinets and countertops are installed
- Final payment after inspection and your walkthrough punch list is cleared
Never pay the full amount upfront, and never let payments run ahead of completed work. If a contractor asks for a large payment before a milestone is finished, that is their cash-flow problem pushed onto yours.
The Consumer Financial Protection Bureau’s home loan tools and resources publishes plain-language guidance on home equity borrowing that is worth reviewing before you sign a loan. The Federal Trade Commission’s consumer guidance on home improvement covers your rights on contracts and cancellation.
What to Do When the Reserve Runs Out
If you exhaust the reserve before the project is finished, stop and re-scope rather than borrow more on impulse. The cheapest options usually do not touch the trades: postpone the backsplash, keep the existing flooring, or paint instead of replacing cabinet doors. The most expensive option is to keep going and finance the overrun at a high rate.
Frequently Asked Questions
How should you divide a kitchen remodel budget?
A common approach is to allocate about 30% to cabinetry, 15% to countertops, 15% to appliances, 10% to flooring, and 20% to labor, with the remaining 10% as a contingency fund. These percentages shift based on your project scope and material choices. For example, a full remodel with custom cabinets will push cabinetry costs higher, while a cosmetic update might keep them lower. Adjust the categories to match your priorities and always keep a cash reserve for unexpected costs.
How much should you set aside for unexpected kitchen remodeling costs?
Set aside 15% to 20% of your total budget as a contingency fund. Older homes often hide issues like outdated wiring, water damage, or uneven floors that only appear after demolition. If your home was built before 1980, lean toward the higher end. This fund covers surprises without forcing you to cut must-haves or pause the project. Treat it as untouchable unless a genuine unexpected cost arises.
Is $10,000 enough for a kitchen remodel?
It depends on the scope. A cosmetic update, such as painting cabinets, replacing hardware, and installing a new backsplash, can fit within $10,000. A full remodel with new cabinets, countertops, appliances, and layout changes will exceed that amount. The key is to define your project scope early. If your budget is limited, prioritize must-haves and phase the work over time. Get a detailed estimate to see what your budget covers.
What kitchen upgrades should you prioritize when planning a budget?
Prioritize upgrades that improve function and add resale value: quality cabinetry, durable countertops, and energy-efficient appliances. These items are expensive to change later and buyers notice them. Nice-to-haves like wine fridges or pot fillers can wait. If you plan to sell soon, focus on neutral finishes and smart storage. If you plan to stay, invest in the features you use daily. A contractor can help you weigh cost versus return on investment.